背景
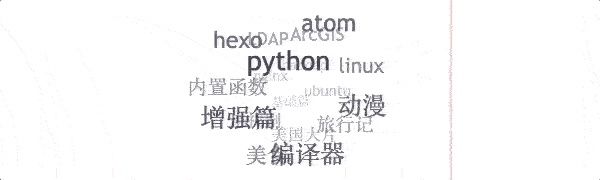
偶然机会在一篇博客上发现TagCloud(启明博客忘记了),效果觉得不错,如上图,而且点击tag直接跳转到对应tag的文章列表,决定在自己的博客中也加上TagClooud。
版本
| id | name | version | remark |
|---|---|---|---|
| 1 | Hexo | v3.8.0 | 系统版本 |
| 2 | NextT.Pisces | v7.0.1 | 主题版本 |
正文
实现TagCloud主要用到了hexo-tag-cloud插件,下面详细介绍一下实现过程。
安装hexo-tag-cloud
在blog根目录,执行以下命令:
执行完之后,在根目录的package.json文件中会自动加入安装的插件以及对应版本。
sidebar.swig文件修改
找到blog/theme/next/layout/_custom/sidebar.swig文件,添加下列代码到文件中。1
2
3
4
5
6
7
8
9
10
11
12{% if site.tags.length > 1 %}
<script type="text/javascript" charset="utf-8" src="/js/tagcloud.js"></script>
<script type="text/javascript" charset="utf-8" src="/js/tagcanvas.js"></script>
<div class="widget-wrap">
<h4 class="widget-title" style="font-size:20px;text-align:center;color:#0080FF;margin:20px 0 0px;">Tag Cloud</h4>
<div id="myCanvasContainer" class="widget tagcloud" style="font-size:20px;">
<canvas width="220" height="200" id="resCanvas" style="width=100%">
{{ list_tags() }}
</canvas>
</div>
</div>
{% endif %}
也可以自定义Tag Cloud标题,加入自定义的样式。
重启server
执行完1、2步之后,需要重启服务,刷新主页,在sidebar处就会看见TagCloud。1
2hexo g
hexo s
Next配置文件
在Next主题的_config.yml中,搜索tagcloud,发现一下代码:1
2
3
4
5
6
7
8
9
10
11# TagCloud settings for tags page.
tagcloud:
# If true, font size, font color and amount of tags can be customized
enable: true
# All values below are same as default, change them by yourself
min: 12 # min font size in px
max: 36 # max font size in px
start: "#ccc" # start color (hex, rgba, hsla or color keywords)
end: "#111" # end color (hex, rgba, hsla or color keywords)
amount: 80 # amount of tags, chage it if you have more than 200 tags
看配置信息是TagCloud的相关配置信息,但是配置了之后,我发现TagCloud没有做出相应的变化。然而你打开自己的tags标签页,就会发现配置的在这里生效了。
样式
生成tag cloud之后,样式比较难看,但是在custome.styl文件加入自定义的样式,不生效。。。。。。郁闷,于是查看源码。
tagcloud.js:blog/node_modules/hexo-tag-cloud/lib/tagcloud.js
tagcanvas.js:blog/node_modules/hexo-tag-cloud/lib/tagcanvas.js
查看tagcloud.js文件,里面有需要的样式参数,修改参数重启服务即可。
我的自定义样式如下:1
2
3
4
5
6
7
8
9
10
11
12
13
14
15
16
17
18
19
20
21
22
23
24
25
26
27
28
29
window.onload = function() {
    try {
        TagCanvas.textFont = 'Brush Script MT';
        TagCanvas.textColour = 'black';
        TagCanvas.textHeight = 16;
        TagCanvas.outlineMethod = 'block';
        TagCanvas.outlineColour = 'cornflowerblue';
        TagCanvas.maxSpeed = 0.03;
        TagCanvas.minBrightness = 0.2;
        TagCanvas.depth = 0.92;
        TagCanvas.pulsateTo = 0.6;
        TagCanvas.initial = [0.1,-0.1];
        TagCanvas.decel = 0.98;
        TagCanvas.reverse = true;
        TagCanvas.hideTags = false;
        TagCanvas.shadow = '#ccf';
        TagCanvas.shadowBlur = 3;
        TagCanvas.weight = false;
        TagCanvas.imageScale = null;
        TagCanvas.fadeIn = 1000;
        TagCanvas.clickToFront = 600;
        TagCanvas.Start('resCanvas');
        TagCanvas.tc['resCanvas'].Wheel(false)
    } catch(e) {
        // console.log(e);
        document.getElementById('myCanvasContainer').style.display = 'none';
    }
};
console.log我给注释掉了,这样控制台就看不到了。
记住,要重启服务。学习
hexo-tag-cloud官方:https://github.com/MikeCoder/hexo-tag-cloud